Table of Contents
ToggleBedrooms are supposed to be sanctuaries, but they quickly turn into clutter zones when storage falls short. Clothes pile on chairs, shoes live under the bed, and closets overflow with items that don’t have a proper home. That’s where thoughtful bedroom cabinet design comes in. Unlike generic closet systems or flimsy wardrobes, purpose-built cabinets offer customizable storage that adapts to how you actually use your space, whether that’s hiding seasonal clothing, organizing accessories, or creating a dedicated spot for linens and out-of-season gear. This guide walks through the essential decisions for designing bedroom cabinets that work hard and look sharp.
Key Takeaways
- Thoughtful bedroom cabinet design eliminates clutter by providing customizable, enclosed storage that adapts to modern multi-use bedroom spaces.
- Built-in cabinets maximize vertical space and add home value, while freestanding options offer flexibility for renters and frequent movers.
- Adjustable shelving, pull-out drawers, and proper interior lighting are essential features that transform bedroom cabinets from storage into functional dressing zones.
- Strategic cabinet placement—such as along the wall opposite the bed or in corner dead zones—balances visual weight while respecting egress windows and natural light.
- Quality materials like 3/4-inch plywood and durable finishes (satin or semi-gloss paint, conversion varnish) ensure bedroom cabinets withstand daily wear and humidity.
- DIY cabinet projects using stock units can save 40–60% on labor, but professional installation is recommended for complex built-ins, scribing, or electrical integration.
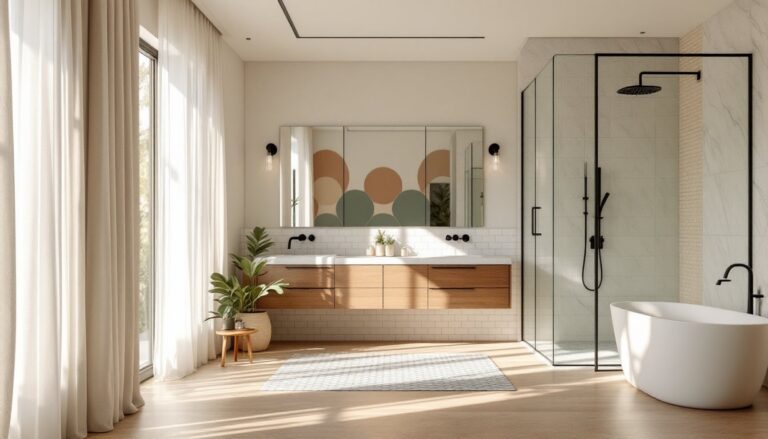
Why Bedroom Cabinets Are Essential for Modern Homes
Bedrooms in 2026 serve multiple roles, sleep space, home office corner, dressing area, sometimes all three. Standard closets weren’t built for this versatility. Cabinet systems solve that gap by offering dedicated compartments, adjustable shelving, and enclosed storage that keeps visual clutter contained.
Unlike open shelving or furniture with exposed surfaces, cabinets hide what you don’t want on display. They’re particularly useful in smaller bedrooms where floor space is tight but wall height is available. Floor-to-ceiling cabinets maximize cubic footage, turning dead vertical space into functional storage.
Cabinets also outperform dressers in efficiency. A well-designed cabinet bank along one wall can replace multiple pieces of furniture, freeing up square footage and simplifying cleaning. They’re permanent solutions that add real value to a home, especially in markets where closet space is a selling point.
For homeowners dealing with older homes that lack adequate closets, adding cabinetry is often more practical than reworking walls or expanding existing closets, especially when load-bearing walls are involved. Cabinets can be retrofitted without major structural changes, permits, or drywall demolition.
Popular Bedroom Cabinet Styles to Match Your Aesthetic
Cabinet style sets the tone for your entire bedroom. Shaker-style cabinets remain the workhorse choice, clean five-piece doors with recessed center panels work in traditional, transitional, and even modern spaces. They’re straightforward to build or order, and the simplicity makes them a safe bet if you’re planning to sell within five years.
Flat-panel (slab) doors suit contemporary and minimalist aesthetics. No ornamentation, just smooth faces in matte or high-gloss finishes. They show every fingerprint and ding, so durability of the finish matters. Thermofoil and high-pressure laminate hold up better than paint in high-contact areas.
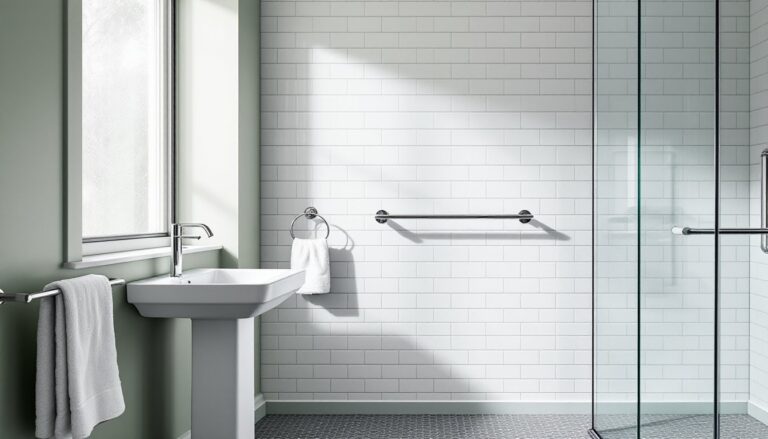
Louvered or paneled doors bring texture and a cottage or coastal feel. They allow some airflow, which is a plus if you’re storing textiles that benefit from ventilation, but louvers collect dust. Plan on regular cleaning if you go this route.
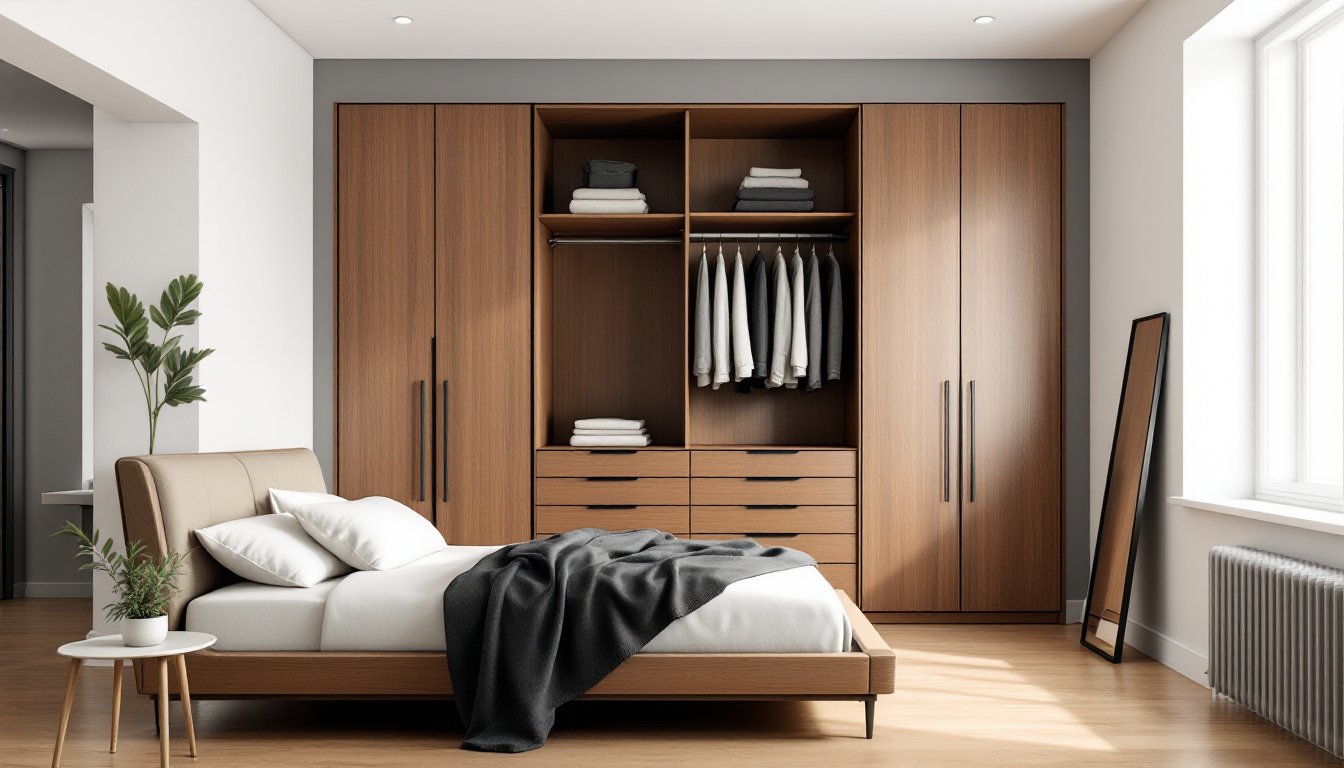
For a mid-century look, wood veneer cabinets in walnut or teak tones with tapered legs (if freestanding) deliver period-correct character. Many current interior design trends lean into warm wood tones paired with matte black or brass hardware.
Built-In vs. Freestanding: Choosing the Right Cabinet Type
Built-in cabinets are permanently installed, typically floor-to-ceiling and wall-to-wall. They’re custom-fitted to the room’s dimensions and often scribed to uneven walls and ceilings (common in older homes). Built-ins maximize every inch, can incorporate crown molding and baseboards for a seamless look, and add appraised value. Downside: they’re not portable. If you move, they stay.
Freestanding cabinets (wardrobes, armoires) offer flexibility. You can take them with you, rearrange them, or sell them. They come in standard sizes, so fitting them into tight or irregularly shaped rooms can be tricky. Freestanding units often leave gaps at the top and sides, which can feel unfinished or collect dust.
For renters or anyone who moves frequently, freestanding is the clear choice. For long-term homeowners tackling a primary bedroom, built-ins justify the investment. If you’re handy, built-ins can be DIYed using stock cabinets from home centers, trimmed out with finish-grade lumber and caulk to look custom.
Strategic Placement: Where to Position Cabinets for Maximum Impact
Placement drives usability. Start by mapping out your bedroom’s “dead zones”, areas that don’t serve a clear function. The wall opposite the bed is prime real estate for a cabinet run, especially if it’s uninterrupted by windows or doors. This creates a focal point and balances the visual weight of the bed.
Flanking the bed with tall cabinets (in place of nightstands or plus to them) works in narrow rooms. It frames the headboard and offers ample storage without eating into the middle of the floor. Just leave at least 24 inches of clearance on each side of the bed for easy movement and bedmaking.
Corner spaces often go wasted. Corner cabinets or angled units capture that square footage. Lazy Susans or pull-out shelves inside make corner storage accessible instead of a black hole for forgotten items.
Avoid placing cabinets where they block natural light or obstruct egress windows (required by IRC for basement and sleeping rooms as emergency exits). If your bedroom is also a legal sleeping room per code, don’t block the window with a floor-to-ceiling unit. Instead, use lower cabinets (under 36 inches) beneath windows or position tall units on adjacent walls.
In rooms with sloped ceilings or dormers, custom-fit cabinets can follow the roofline, utilizing space that standard furniture can’t. This often requires a carpenter or careful DIY measuring, but the payoff is storage where none existed before.
Design Features That Maximize Bedroom Storage
Good cabinet design isn’t just about volume, it’s about organizing that volume. Adjustable shelving is non-negotiable. Fixed shelves lock you into one configuration: adjustable shelf pins (on 32mm or 1-inch spacing) let you adapt as needs change.
Pull-out drawers and baskets beat fixed shelves for accessibility. Items in the back stay visible and reachable. Soft-close drawer slides (like Blum Tandem or similar) add longevity and cut noise. Undermount slides are cleaner looking than side-mount, but they cost more and require precise installation.
Vertical dividers inside cabinets keep stacks of sweaters, purses, or bins upright instead of toppling. These can be permanently installed or added as aftermarket organizers.
For shoe storage, angled shelves or cubbies work better than flat shelves. They display shoes clearly and use vertical space efficiently. Plan on about 7 inches of height per pair for most styles: boots need 12–16 inches.
Hanging rods inside cabinets accommodate dresses, suits, and coats. Standard rod height is 60–68 inches from the floor for long garments: double-hang rods (one at 40 inches, one at 80 inches) double capacity for shorter items like shirts and folded pants. If you’re building this yourself, use 1-5/16-inch diameter closet rods in steel or solid wood, anything thinner will sag under a full load.
Incorporate lighting inside cabinets with battery-powered LED puck lights or low-voltage wired strips. Motion-sensor options are available and eliminate the need for switches. Proper lighting turns cabinets into functional dressing zones, not dark caves.
Many successful DIY furniture builders integrate pull-out hampers, jewelry trays, and belt/tie racks into cabinet designs, details that elevate everyday use.
Materials and Finishes: Selecting the Perfect Look for Your Bedroom
Cabinet boxes (the structural shell) are typically built from plywood or MDF (medium-density fiberboard). 3/4-inch cabinet-grade plywood (often birch or maple veneer) is the gold standard for DIY and semi-custom builds, strong, screw-holding, and stable. It’s more expensive than MDF but resists moisture better, which matters in humid climates or if the bedroom shares a wall with a bathroom.
MDF is smooth, uniform, and takes paint beautifully. It’s the go-to for painted cabinets because it won’t show wood grain or knots. It’s also heavier than plywood and more prone to sagging on long spans, so internal support or thicker material (sometimes 1-inch MDF) may be needed for wide shelves.
Particleboard is the budget option. It’s fine for light-duty use in freestanding furniture but shouldn’t be used in structural or high-load applications. Screws don’t hold well in particleboard, and it swells badly if it gets wet.
Door and drawer fronts set the visual tone. Solid wood (maple, oak, cherry, alder) offers timeless appeal and can be stained or painted. It expands and contracts with humidity, so proper joinery and finish are critical to avoid warping.
Thermofoil and laminate are low-maintenance, moisture-resistant alternatives. Thermofoil is a vinyl layer heat-formed over MDF: it’s durable but can peel if exposed to high heat (don’t install near radiators). High-pressure laminate comes in endless colors and textures, resists scratches, and cleans easily.
For a warm, natural look, wood veneer over plywood balances cost and aesthetics. The veneer is real wood (usually 1/42-inch thick), so it takes stain like solid wood but costs less and stays more stable.
Finish choices matter for durability. Satin or semi-gloss paint in a high-quality acrylic or hybrid formula (like Benjamin Moore Advance or Sherwin-Williams Emerald Urethane) resists scuffs and wipes clean. Matte finishes look modern but show every fingerprint.
Stains and clear topcoats (polyurethane, conversion varnish, or water-based poly) require surface prep and multiple coats. For high-traffic cabinet doors, a harder topcoat like conversion varnish holds up better than standard poly but requires spray equipment and ventilation. When exploring workshop setups and finishing techniques, ventilation and dust control become priorities for achieving professional results.
DIY Bedroom Cabinet Projects vs. Professional Installation
DIY is realistic if you have basic carpentry skills, the right tools, and patience. Building a simple cabinet bank using stock base and wall cabinets from a home center, then adding trim and hardware, is a solid weekend project for someone comfortable with a drill, level, and miter saw. You’ll save 40–60% on labor costs, and the satisfaction of building your own storage is real.
Key tools you’ll need: circular saw or miter saw, drill/driver, level (a 4-foot or 6-foot model), stud finder, clamps, and a tape measure. If you’re building from scratch, a table saw and pocket hole jig (like a Kreg system) make assembly faster and cleaner. Don’t skip safety glasses and hearing protection, miter saws and routers are loud, and sawdust is inevitable.
Challenges to expect: walls are rarely plumb or square, especially in older homes. Scribing cabinets to fit uneven surfaces takes time and a steady hand. Hanging upper cabinets solo is awkward: a cabinet jack or a helper is strongly recommended. Securing cabinets to studs is non-negotiable, use 2.5-inch or 3-inch cabinet screws driven into solid framing, not just drywall anchors.
Professional installation makes sense for complex built-ins that require custom millwork, scribing to fit irregular spaces, or integration with electrical (like built-in lighting or outlets). Licensed contractors also carry insurance, which matters if something goes wrong during install.
If your bedroom cabinet project involves structural changes, removing or modifying walls, adding headers, or running new electrical circuits, hire a pro or at minimum consult one. Load-bearing walls can’t be altered without engineered plans and permits. Electrical work must meet NEC (National Electrical Code) standards: many jurisdictions require a licensed electrician for anything beyond replacing a fixture.
For a middle-ground approach, some DIYers build the cabinets themselves and hire a finish carpenter for installation and trim work. This splits the labor savings while ensuring the final fit and finish meet professional standards.
Be realistic about time. A full wall of built-in cabinets might take an experienced DIYer 20–30 hours spread over multiple weekends. First-timers should double that estimate. Budget delays for mistakes, tool rentals, and trips back to the lumberyard, they happen.