Table of Contents
ToggleBathroom tile choices set the tone for the entire space, they define color, texture, scale, and visual flow. Whether tackling a full gut renovation or updating a backsplash and floor, the right tile design balances function with style. Slip resistance, moisture tolerance, and grout maintenance matter as much as aesthetics. The trends for 2026 lean toward bold pattern play, natural materials, and oversized formats that reduce grout lines and speed installation. This guide breaks down seven tile design approaches that deliver both visual impact and long-term durability.
Key Takeaways
- Bathroom tiles design ideas for 2026 emphasize bold patterns, natural materials, and oversized formats that reduce grout lines while speeding up installation.
- Subway tiles remain a reliable choice; elevate them with vertical stacks, herringbone patterns, or soft color shifts like sage green and terracotta instead of stark white.
- Patterned cement tiles and marble-look porcelain deliver luxury and statement style, but require proper sealing and strategic placement to avoid overwhelming small spaces.
- Large-format tiles (15×15 inches or larger) create seamless, spacious-feeling bathrooms with minimal grout maintenance, though they demand flat substrate prep and careful handling.
- Color blocking, ombré gradients, and contrasting grout amplify visual impact—test grout colors on samples first since wet grout dries 1–2 shades lighter than expected.
- Textured and 3D tiles add dynamic depth on accent walls, but reserve smooth tiles for floors to prevent slipping hazards and maintenance headaches.
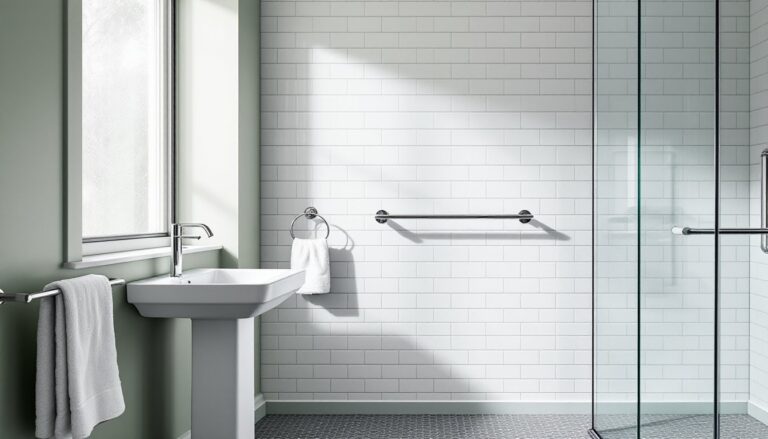
Classic Subway Tiles with a Modern Twist
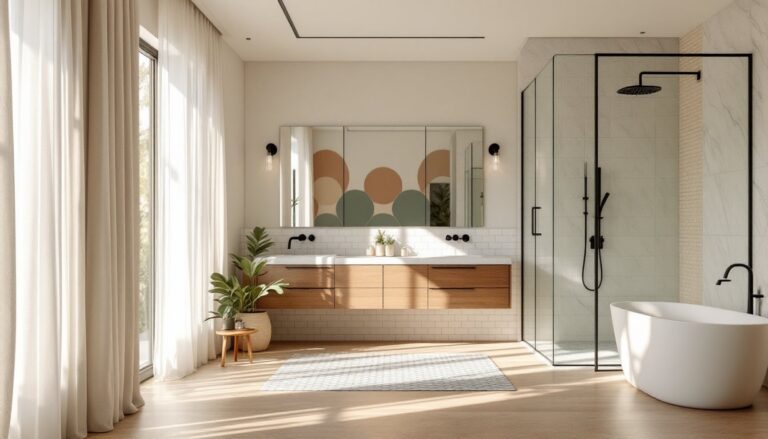
Subway tiles, typically 3×6 inches in ceramic or porcelain, remain a reliable choice for wet areas. Standard white with beveled edges and running bond layout (offset by half a tile) offers a clean backdrop, but 2026 trends favor fresh variations.
Vertical stacks (tiles aligned in columns rather than staggered) create height in compact bathrooms. Herringbone or chevron patterns add movement without switching tile types. Color shifts matter: soft grays, sage greens, and warm terracottas replace stark white in many projects. Glossy finishes reflect light in small spaces, while matte glazes hide water spots and fingerprints.
Grout width affects the look. Tight ⅛-inch joints give a seamless, modern feel: wider ¼-inch joints in contrasting colors (charcoal grout with white tile) emphasize the grid. Use unsanded grout for joints under ⅛ inch, sanded grout for wider spacing to prevent cracking.
Installation tip:mark a level reference line before starting. Walls are rarely plumb, and eyeballing the first row leads to compounding errors. A laser level or 4-foot spirit level keeps courses straight. If the bathroom sees heavy steam (no exhaust fan or small window), seal grout lines annually with a penetrating sealer to block mildew.
Subway tiles pair well with freestanding tub installations for a cohesive, classic aesthetic.
Bold Patterned Tiles for Statement Floors and Walls
Patterned cement tiles (also called encaustic tiles) and ceramic designs bring graphic punch to floors and accent walls. Expect Moroccan geometrics, Spanish-inspired motifs, and bold florals. These tiles typically measure 8×8 inches or 12×12 inches and ship with color variations, embrace them for a handmade look.
Floor applications demand tiles rated for PEI Class III or higher (moderate to heavy traffic). Cement tiles are porous and require an initial seal coat before grouting, then periodic resealing. Skip this step, and they’ll stain from grout haze and everyday splashes.
For feature walls behind vanities or in shower niches, patterned tiles command attention without overwhelming the space. Limit patterns to one zone: if the floor is busy, keep walls neutral, or vice versa. Mixing too many patterns creates visual clutter in small bathrooms.
Checkerboard layouts offer a retro-modern vibe with two-tone tiles, and they’re easier to install than complex multi-color patterns.
Grout choice matters. White or light grout highlights individual tile patterns: dark grout blends joints for a unified look. Use epoxy grout in high-moisture areas, it resists staining and mildew better than cementitious grout but costs more and requires quick cleanup during installation.
Layout dry (no mortar) before mixing thinset. Patterned tiles often have directional designs: rotating one tile throws off the entire field. Number the backs with pencil if the pattern repeat isn’t obvious.
Natural Stone and Marble-Look Tiles for Timeless Elegance
Natural stone, marble, travertine, slate, and high-quality porcelain marble-look tiles deliver luxury and longevity. Real marble (Carrara, Calacatta) requires sealing every 6–12 months and etches from acidic cleaners. Porcelain alternatives mimic veining and texture without the maintenance burden, and they cost 30–50% less.
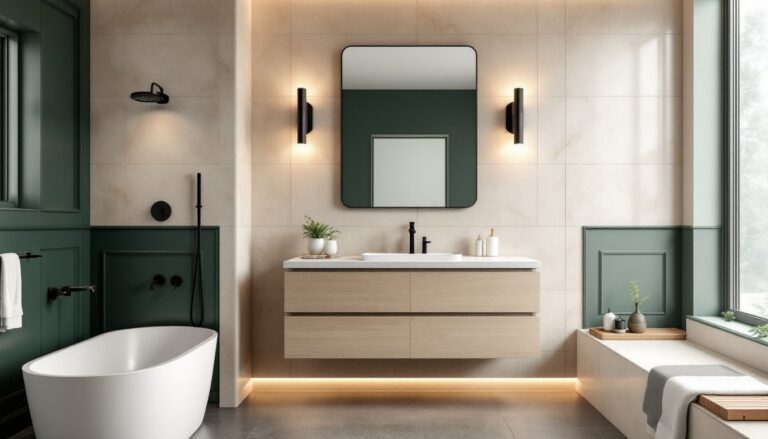
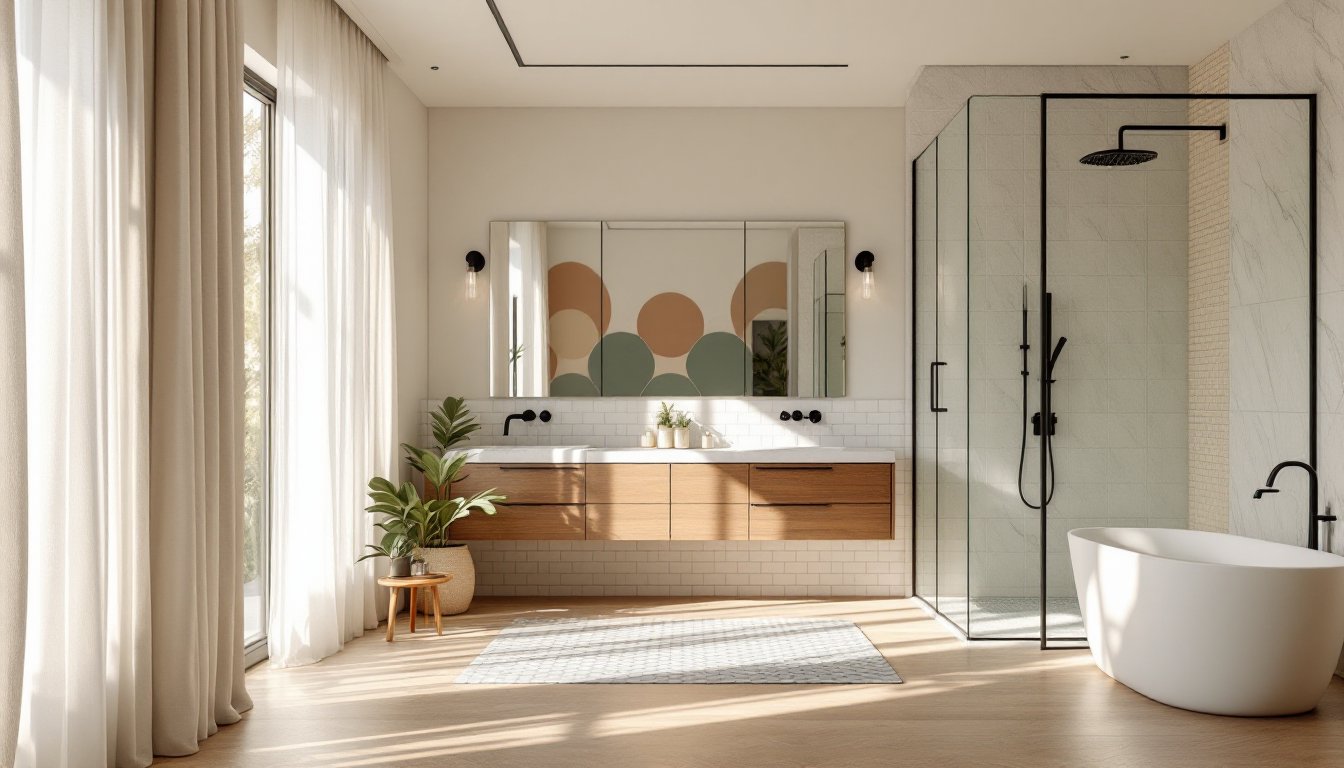
Large-format marble-look tiles (12×24 inches or larger) reduce grout lines and speed installation. For shower walls, many designers favor contemporary bathroom styles that pair marble tiles with matte black fixtures for contrast.
Stone and stone-look tiles work on floors and walls, but verify the coefficient of friction (COF) for wet areas. Polished marble is slippery when wet: choose honed or textured finishes for shower floors. The Americans with Disabilities Act (ADA) recommends a wet COF of 0.60 or higher for accessible showers.
Installation notes: natural stone requires thin-set mortar labeled for stone (non-staining, polymer-modified). White thin-set can telegraph through light marble: use a matching color or apply a bond coat first. Lippage (uneven tile edges) is common with natural stone due to thickness variation, use a leveling system (clips and wedges) during installation to keep surfaces flush.
Backsplash and accent strips in smaller stone mosaics (1×2-inch subway shapes or hexagons) add visual interest without the cost of full-wall coverage.
Large Format Tiles for a Seamless, Spacious Feel
Large-format tiles, anything over 15×15 inches, often 24×48 inches or even 48×48 inches, minimize grout lines and create a sleek, continuous surface. Fewer grout joints mean less scrubbing and lower long-term maintenance. Popular in contemporary and minimalist bathrooms, these tiles make small spaces feel larger by reducing visual breaks.
Rectified edges (precision-cut, sharp corners) allow tight grout joints (⅛ inch or less) for a near-seamless look. Non-rectified tiles need wider joints to accommodate edge variation.
Handling large tiles requires care. A single 24×48-inch porcelain tile can weigh 20+ pounds. Use a suction cup lifter or recruit a helper to avoid cracking during placement. Back-buttering (applying thin-set to both the substrate and tile back) ensures full coverage and prevents voids that lead to cracks under point loads.
Substrate prep is critical. Large tiles telegraph imperfections, any dip or hump in the subfloor or wall shows through. For floors, ensure a flat surface within ⅛ inch over 10 feet using a straightedge. Skim-coat low spots with self-leveling compound or mortar bed. Walls need sound backing: ½-inch cement board or waterproof backer board over studs spaced 16 inches on center.
Cutting large tiles requires a wet saw with at least a 10-inch blade. Scoring and snapping won’t work cleanly on thick porcelain. Rent a professional tile saw if the project involves more than a few cuts.
Large-format tiles pair well with frameless glass shower enclosures and floating vanities for a cohesive modern look.
Creative Color Palettes and Tile Combinations
Color blocking, using two or three tile colors in defined zones, adds personality without pattern complexity. A popular approach: neutral field tiles (white, beige, gray) with a bold accent color (navy, forest green, burnt orange) on one wall or the lower third of a shower.
Ombré gradients (tiles transitioning from light to dark) create a soft, modern effect. Many tile lines now offer coordinated color families in five or more shades. Plan the layout before ordering, ombré works best on single walls rather than wrapped around corners.
Contrasting grout amplifies tile geometry. White tiles with black grout highlight each piece: tonal grout (gray tile with charcoal grout) creates subtle definition. Test grout colors on sample tiles before committing. Wet grout dries 1–2 shades lighter.
Mixing tile sizes and shapes in the same color family adds texture. Combine 12×24-inch planks on walls with 2×2-inch mosaics on floors, or pair hexagon accent tiles with rectangular field tiles. Keep the color palette tight (two to three hues max) to avoid chaos.
Earthy palettes, terracotta, ochre, sage, clay, dominate 2026 trends. These warm tones pair with brass or matte black fixtures and natural wood vanities. Cool palettes (blues, grays, whites) suit coastal or Scandinavian aesthetics.
For design inspiration showcasing color and material combinations, many homeowners browse resources like Homify to visualize tile pairings in real spaces.
When mixing finishes (glossy and matte, smooth and textured), group similar finishes in zones rather than scattering them randomly.
Textured and 3D Tiles for Added Depth
Textured tiles, featuring raised patterns, waves, or geometric reliefs, catch light and shadow for a dynamic surface. 3D wall tiles (often porcelain or ceramic) create focal points behind vanities or in shower niches. Common patterns include hexagons, chevrons, and organic ripples.
These tiles work best on single accent walls. Full-room coverage can overwhelm and complicate cleaning (dust and soap scum settle in crevices). Use smooth tiles on floors to avoid tripping hazards and difficult maintenance.
Installation requires attention to grout depth. Raised tiles need careful grouting to fill recessed joints without smearing the surface. A grout bag (like a pastry bag) delivers precise application in tight spots. Clean excess grout immediately with a damp sponge, dried grout is hard to remove from textured surfaces.
Wood-look tiles with embossed grain texture offer the warmth of wood with tile’s water resistance. These porcelain planks (typically 6×36 inches or 8×48 inches) mimic oak, walnut, or reclaimed barn wood. Lay them in a random offset pattern (varying the stagger) for a natural wood floor appearance.
Safety note: textured shower floors improve slip resistance but can be harder to clean. A handheld showerhead and stiff brush help reach grooves. Avoid highly porous textured tiles (like unglazed terracotta) in wet zones, they harbor mold.
Pair textured accent walls with simple, flat-finish tiles elsewhere to let the texture stand out. Lighting placement matters: grazing light (fixtures mounted to shine across the surface) emphasizes texture: direct overhead light flattens it.
Conclusion
Tile selection blends aesthetics with function, slip ratings, maintenance, and installation complexity all factor in. Subway tiles, bold patterns, natural stone looks, large formats, creative colors, and textured surfaces each solve different design challenges. Plan layouts on paper or with painter’s tape on walls before ordering materials. Account for 10% waste on straight installations, 15–20% on diagonal or complex patterns. Most bathroom tile projects suit confident DIYers with tile saw access, but floor flatness issues or full waterproofing systems may warrant a pro consult.