Table of Contents
ToggleDesigning a shower isn’t just about installing tile and a showerhead, it’s about creating a functional, comfortable space that holds up to daily use and looks good doing it. Whether someone’s tackling a full bathroom remodel or replacing a worn-out tub-shower combo, the decisions they make now will affect their routine for the next decade or more. From choosing the right footprint for tight spaces to selecting materials that won’t turn into a maintenance nightmare, every detail matters. This guide walks through the core considerations for planning a shower that works, from layout and style to finishes and fixtures, with a realistic look at what’s DIY-friendly and where to call in a pro.
Choosing the Right Shower Layout for Your Bathroom
Layout decisions come first because they dictate everything else, plumbing rough-in, door swing, and how much elbow room someone actually gets. The most common configurations are corner showers, alcove (three-wall) showers, and walk-in designs.
Corner showers fit a stall into an unused corner, making them ideal for small or awkwardly shaped bathrooms. Standard sizes start at 32″ x 32″, but 36″ x 36″ or larger feels noticeably more comfortable. Anything smaller than 30″ x 30″ is tight for most adults.
Alcove showers replace an existing tub or occupy a space flanked by three walls. They’re straightforward to frame and tile, and because the walls are already enclosed, waterproofing is more manageable. Typical width is 60″ (the old tub footprint), though 48″ and 72″ widths exist.
Walk-in or barrier-free showers eliminate the curb for accessibility or a modern, open look. These require careful floor pitch (minimum 1/4″ per foot slope toward the drain per IRC standards) and a linear drain or center point drain. The entire floor must be waterproofed with a sloped mortar bed or foam pan. This isn’t a beginner project, hire a tile setter if slope and waterproofing are new territory.
Before breaking out the demo hammer, check whether moving plumbing is on the table. Relocating a drain often means cutting into the subfloor and possibly a ceiling below. If the shower’s staying put, layout becomes simpler. If it’s moving, budget for a licensed plumber and possible permit requirements depending on local code.
Popular Shower Design Styles to Consider
Style guides can veer into vague inspiration, but the choices here have real implications for material selection, fixture specs, and how much grout someone will be scrubbing.
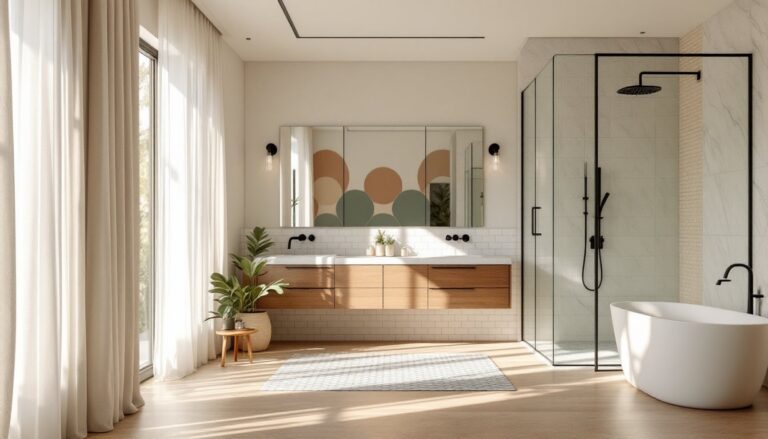
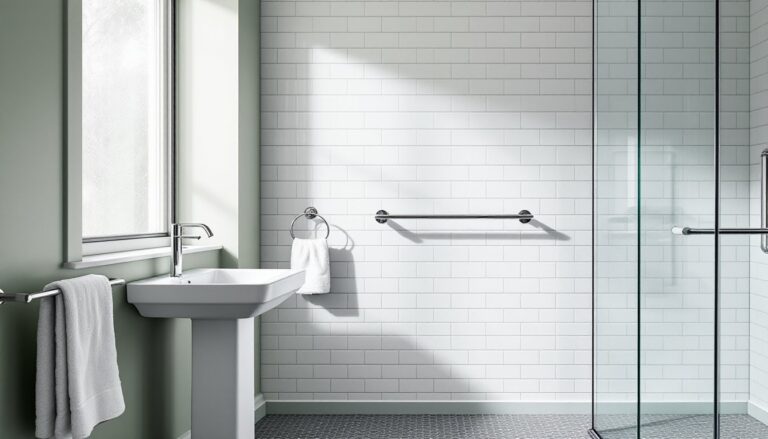
Modern Minimalist Showers
Clean lines, frameless glass enclosures, and large-format tiles define this look. The goal is visual simplicity, fewer grout lines, no bulky frames, and streamlined hardware.
Materials often include 12″ x 24″ or larger porcelain tiles, sometimes in a stacked or brick-bond pattern instead of offset. Grout lines shrink to 1/8″ or smaller, which cuts cleaning time but demands precision installation. Frameless glass panels (typically 3/8″ or 1/2″ thick tempered glass) attach with minimal hardware, hinges and a header bar, or even just wall clips for a truly open feel.
Fixtures lean toward matte black, brushed nickel, or polished chrome in geometric shapes. Waterfall or rain showerheads pair well with hand-held combos on slide bars. For tile choices, many interior design platforms showcase similar minimalist aesthetics in real-world installations.
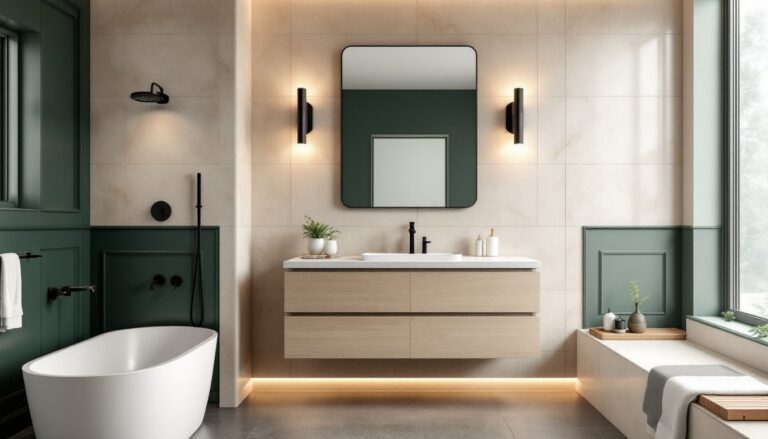
Spa-Inspired Luxury Designs
Think natural stone, multiple spray patterns, and integrated seating or niches. This style prioritizes comfort and a high-end feel, but it comes with added complexity and cost.
Common materials include natural marble, travertine, or slate, often mixed with accent strips of glass or metal mosaic. Stone requires sealing (usually annually) and shows water spots more than porcelain. If the look matters but maintenance doesn’t appeal, porcelain tile that mimics stone is a practical swap.
Built-in benches (framed at 17″–19″ high, the standard seat height) and recessed niches for shampoo bottles add function. Both require waterproofing behind and under the feature, use a foam bench kit or build one with mortar and waterproof membrane.
Fixture-wise, body sprays, steam generators, and thermostatic valves (which maintain temperature even when a toilet flushes) are typical upgrades. Installing body sprays means running additional supply lines inside the wall during rough-in. If considering steam, the enclosure must be fully enclosed (no gaps at the top) and the ceiling should slope slightly to prevent drips.
Selecting Shower Materials and Finishes
Material choice affects durability, maintenance, and how much prep work goes into installation. Tile is the go-to, but panels and solid-surface options exist for those who’d rather skip grouting.
Ceramic and porcelain tile dominate because they’re water-resistant, available in endless styles, and relatively affordable. Porcelain is denser and better suited for floors and high-moisture areas. Expect to pay $3–$15 per square foot for mid-grade tile, plus thinset, grout, and waterproofing membrane.
Wall tile can go directly over cement board or, better, a waterproof membrane system like Schluter Kerdi or RedGard liquid membrane. Floors need a mortar bed or pre-sloped foam pan to ensure proper drainage. Don’t skip this, standing water leads to mold and membrane failure.
Natural stone (marble, granite, slate) looks stunning but needs sealing and shows etching from acidic cleaners. It’s also heavier, sometimes requiring additional floor support. Use a polymer-modified thinset rated for stone to prevent staining from the adhesive.
Acrylic or fiberglass shower surrounds are DIY-friendly, lightweight, and low-maintenance. They come in multi-piece kits that fit through doorways and attach with adhesive. Quality varies, thicker acrylic (1/4″ walls) resists flexing better than thin fiberglass. These won’t have the custom look of tile, but they’re fast and waterproof out of the box.
Solid surface panels (brands like Corian or similar) offer a grout-free, seamless look. Panels typically come in 1/2″ thick sheets up to 10 feet long. Installation requires backing support and professional cutting/joining for seams. Cost runs higher than tile, expect $50–$100+ per square foot installed.
For grout, use epoxy grout on floors and in steam showers, it’s stain-resistant and truly waterproof. Cement grout (even sanded and sealed) will eventually discolor in high-traffic areas.
Essential Features and Fixtures for Functional Shower Design
Fixtures and features make or break daily use. Flashy rainfall heads are nice until someone realizes there’s no way to rinse their back without freezing.
Showerheads and valves: A fixed rain head (8″–12″ diameter) offers coverage but less pressure. Pair it with a hand-held on a slide bar for flexibility. Thermostatic or pressure-balance valves are code-required in most jurisdictions (per IPC and IRC) to prevent scalding when water pressure shifts.
Valve rough-in height is typically 48″ from the finished floor: showerhead outlet is 78″–80″. Measure to finished wall surface, not stud face, to avoid trim-plate gaps later.
Niches and shelving: Recessed niches (cut between studs at 14.5″ wide for 16″ on-center framing, or 22.5″ for 24″ centers) keep bottles off the floor. Frame them during stud work, line with waterproof membrane, and tile the interior. Preformed foam niches simplify the process and integrate with membrane systems. Avoid placing them on exterior walls in cold climates, condensation and freeze risk.
Benches and grab bars: Built-in benches should be reinforced with blocking behind the tile, as should grab bar locations. Even if grab bars aren’t installed now, adding 2×6 or 2×8 blocking between studs at 33″–36″ height makes future installation easy. ADA guidelines call for 1.5″ clearance behind bars, achievable with offset flanges.
Glass enclosures: Frameless enclosures need 3/8″ or thicker tempered glass and solid blocking or metal framing for hinge points. Semi-frameless uses a frame around the perimeter but not at the door, saving cost. Framed enclosures are budget-friendly but collect soap scum in the tracks. Choose pivot or hinged doors over sliders for easier cleaning.
Lighting and ventilation: Shower lighting should be rated for wet locations (look for UL Wet or Damp ratings). Recessed LED trims work well. An exhaust fan rated for the bathroom’s square footage (typically 50–100 CFM) is required by code in most areas to manage moisture. Vent it to the exterior, not into an attic.
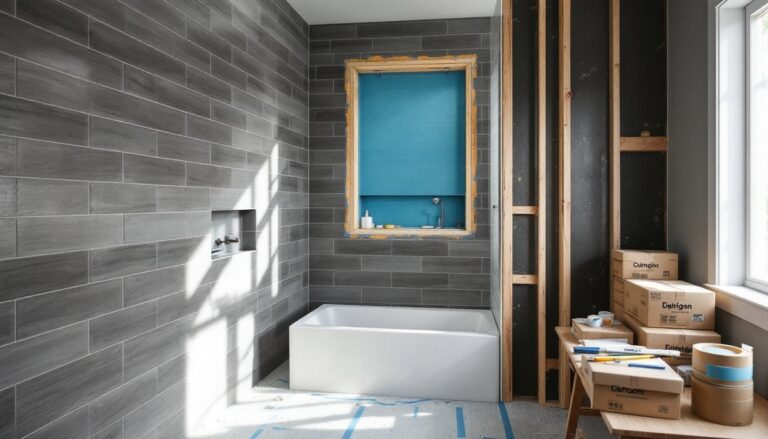
Planning Your Shower Design: Budget and DIY Considerations
Realistic budgeting separates finished projects from half-done bathrooms. Costs vary widely depending on materials, labor, and how much of the existing space gets torn out.
A basic alcove shower with mid-grade tile, standard fixtures, and DIY labor runs $1,500–$3,500 in materials (tile, cement board, waterproofing, valve, showerhead, glass door). A walk-in design with natural stone, frameless glass, and body sprays can hit $8,000–$15,000+ even before labor.
Professional installation adds $2,000–$5,000+ depending on region and scope. Tile setters charge $10–$25 per square foot: plumbers bill $75–$150 per hour. If the project involves moving drains, adding blocking, or modifying framing, costs climb.
DIY-friendly tasks include demoing old surrounds (wear gloves, goggles, and a respirator if there’s mold), installing cement board, applying waterproof membrane, and setting wall tile with a notched trowel. Floor tile and sloped mortar beds are trickier, practice on a small area first or hire it out.
When to call a pro: Anything involving supply and drain lines requires a licensed plumber in most jurisdictions, and inspections may be needed. Structural changes (moving walls, cutting joists for new drain lines) need permits and possibly an engineer’s stamp. Electrical work for lights or exhaust fans should follow NEC guidelines and local code, hire an electrician if unsure.
If planning a shower as part of a larger bathroom renovation, coordinate fixture rough-in early. Tubs, showers, and vanities share the same water supply, so layout impacts plumbing runs.
Permit requirements vary by municipality. Cosmetic work (replacing tile or fixtures on existing plumbing) often doesn’t need one, but moving plumbing, adding electrical, or altering structure typically does. Call the local building department before starting, a failed inspection means ripping out finished work.
Material costs fluctuate with market conditions. Tile, glass, and fixtures saw price jumps in recent years: shop multiple suppliers and watch for contractor-grade discounts at tile shops. Big-box stores carry budget options, but specialty dealers often stock better selections and offer layout advice.
Finally, don’t skip prep work. Acclimate tile to the room for 24 hours before installation. Check walls for plumb and level, out-of-whack framing means tapered cuts and wonky grout lines. Waterproofing isn’t optional: even small gaps lead to rot and mold behind walls. When guidance from experienced professionals matters, resources like Remodelista’s bathtub and shower guide and advice from networks such as HGTV provide tested approaches for real-world installs.
A well-planned shower holds up for years with minimal maintenance. Take time on layout, invest in quality waterproofing, and choose materials that match both the look someone’s after and the upkeep they’re willing to handle. Do it right, and the result is a shower that works as well as it looks, no regrets when the tile’s set and the grout’s dry.